Showing posts with label bottoms. Show all posts

Remix'd: High Waist Skirt

    | 29 comments
high waist skirt {who is that girl Mo?}
I thrifted this house dress for the pretty patterns and colors and knew it would make for a cute high waist skirt. I removed the bottom portion of the dress, created a waistband and inserted a zipper.

Remix'd: Crop Top + Printed Pockets

    | 26 comments
fabric pockets {who is that girl Mo?}
You can create anything from old clothing especially if it is over-sized. It can also be used as a cheaper alternative to buying fabric. I thrifted this maxi dress and out came a crop top and fabric covered pockets on a pair of cut offs . My first idea was to make a two piece short or skirt set but I needed a much larger sized dress. I still like how this turned out because it's still a 2 piece set. 

Remix'd: Festival Inspired

    | 19 comments
Weekend 2 of the Coachella Festival is this upcoming weekend and sadly I will not be attending. Again. But that's alright, I can pretend. In spirit of festival style I created a fringe tee and scalloped edge denim shorts.

DIY: Another Striped Pencil Skirt
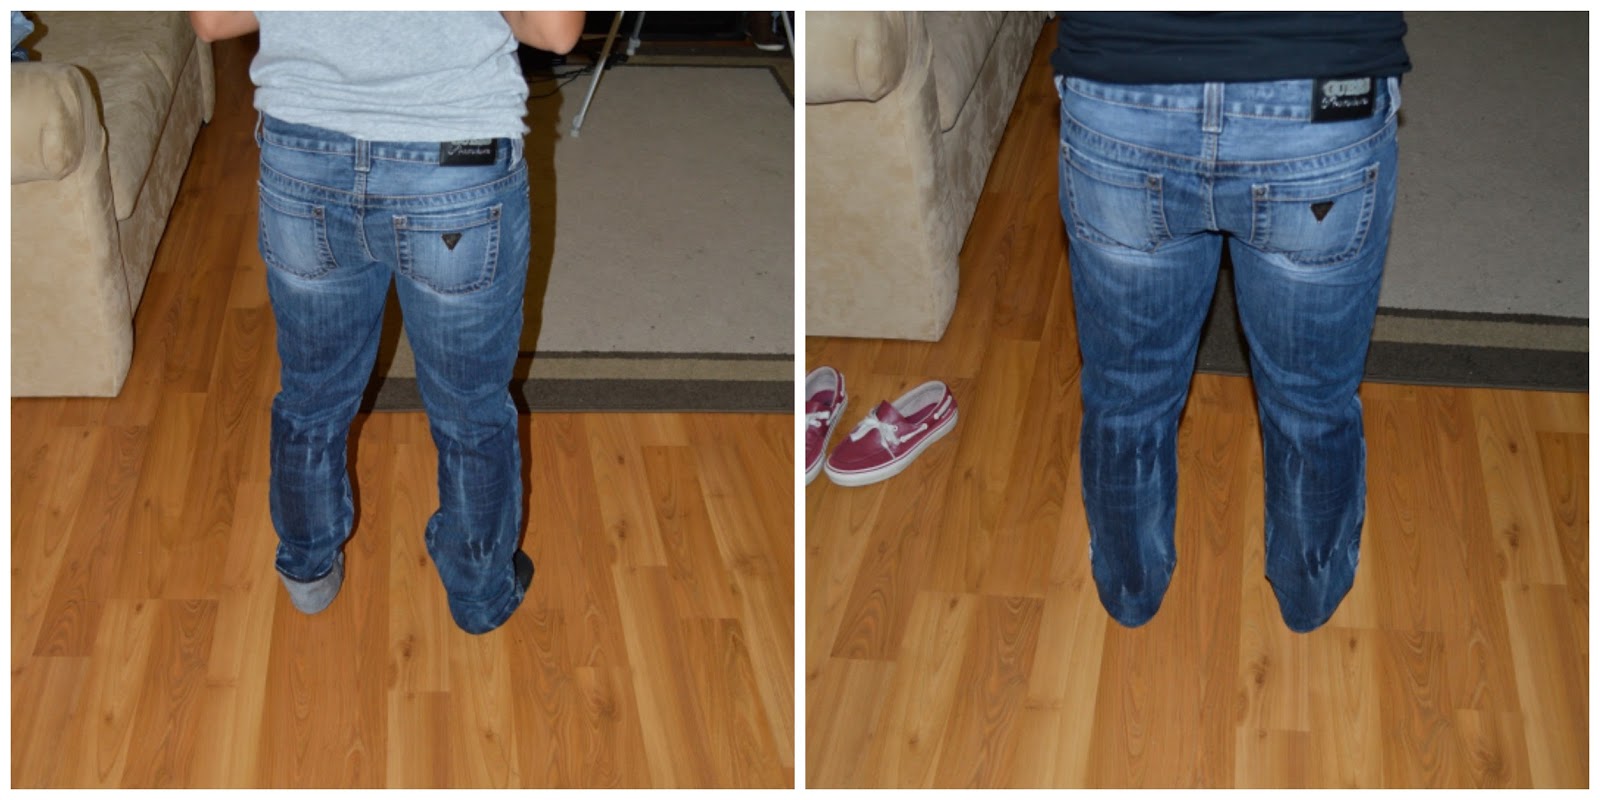
    | 38 comments
Striped pencil skirt day and night {who is that girl mo?}
I decided to make yet another pencil skirt but with vertical stripes this time. I used a black and white stretch fabric with wide stripes. This is the 4th pencil skirt that I have made and I love how versatile it is so here's a day to night look on how I'd style this skirt.

DIY: Tie Dye Jeans

    | 29 comments

This week's DIY project is Tie Dye Jeans. I know tie dye articles of clothing are usually worn in summer months but who cares about the rules. Besides, I'm in Cali which mean there are usually more warm days than not. At least during the day. For those of you who may recall my acid wash jeans project, it may seem like it's similar to this project but I promise the results are different. I'm going to do this project again with colored dye using my white jeans to wear during the upcoming Spring months.
Supplies:
jeans
rubber bands
bleach
bucket
gloves
 
  • Soak the jeans in cold water and ring out.
  • Tie the rubber bands around the jeans in bunches until it is tied into a ball. There is no right or wrong way to do this. The areas with the bands is where the darker patches will be.
  • Mix 1 part bleach and 2 parts water in the bucket. With gloves, place the jeans into the bucket.
  • Let sit for a few hours or so and keep checking until desired results are achieved. I let mine sit for 3 hours. More time = more white/lighter patches.
  • Remove the jeans with the gloves and rinse in sink or tub with cold water.
  • Air dry. I let mine dry overnight.
  • Machine wash alone with soap and then machine dry.


What do you think about tie dye jeans? What color dyes should I use for my Spring pair?
 
Outfit Details:
thrifted jeans H&M | blazer H&M | shirt Target | thrifted men's boots


Linking up with: Funday Monday | Monday Mingle | The Style Record | Two Birds 
Do Tell Tuesday | All Things Pretty | Treat Yo Self

Sporty Cool

    | 11 comments

I bought this denim skirt from JCP a few years back and was going to toss it because frankly Mel never liked it and still don't. I probably didn't either since there wasn't any hesitation to throw it into my toss away pile. Lately I've been pulling pieces back from the pile and giving them fresh makeovers. For this skirt, I figured that a knee length style would look better and I'll like it a lot more than I originally thought. I can style it with riding boots when the temperature drops and with a pair of high top chucks when it gets hot again. Let's face it, I can wear it with anything just because it's denim. As you can see, the skirt had a split in the front, so I added a leftover piece from the scraps and sewed it using the mustard/gold colored denim thread. I left the edges raw. Fresh and easy! I styled it with a cropped sweater that I made, floral cap and a pair of ankle boots for a sporty Fall look. 


Have a great weekend!!


Outfit Details:
sweater Old Navy & DIY | skirt Bisou Bisou & DIY |  boots Target | cap Urban Outfitters

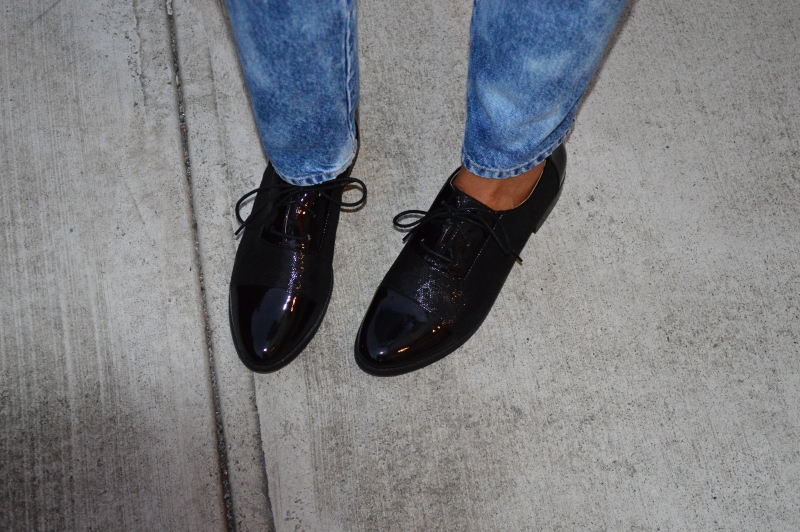
DIY: Tuxedo Stripe Jeans

    | 26 comments

Supplies:
painters tape
fabric paint or acrylic paint
textile medium
gloss varnish or sealer
paintbrush or sponge
bowl or plate for paint
jeans
Make sure the jeans are ironed and free from wrinkles.
Apply the painters tape to the side of your jeans about 2 inches wide. My jeans already had a panel so I didn't have to do any measuring.
Pour the paint in the bowl and begin applying the paint to the jeans. If you use acrylic paint, mix it with the textile medium before painting. This is so the paint area won't be stiff and hard. I used the same shade paint as my jeans because I wanted a subtle stripe versus a stark contrast. 
Let paint dry. A hour should be good enough. Repeat on other side. If necessary, apply another coat of paint. I applied a coat of clear gloss varnish to make it shine and stand out a little more since it was kind of blending in. 
You can also create the tuxedo stripe look by applying a 1- 2 inch wide ribbon of your choice to the sides of your jeans with glue, adhesive tape or by sewing it on.


What do you think about tuxedo stripe pants/jeans? Will you be making yourself a pair?

Outfit Details:
Mint jeans DKNY | Burgundy shirt Target | Black boots Nine West

DIY: Denim Refashioned 2 Ways

    | 22 comments

Happy Monday guys! This week I am collaborating with Mckenzie from Why Buy It? DIY It!. We will be posting a DIY collaboration once a month on the first Monday of each month which we will title Refashion Mondays. I know today is the second Monday but we finalized everything a few days ago. We will rotate choosing trends and ideas and we will each present our version of the chosen trend. Sounds fun right?! This month's topic is denim refashion. There are many ways you can take a plain pair of jeans and make it look completely different. My last denim refashion was patchwork jeans and you can read the tutorial here. For this refashion I chose acid wash denim and Mckenzie chose two tone denim. 
Supplies:
jeans
bleach
spray bottle
rubber gloves
pumice stone (optional)
drop cloth (optional)
There are actually 2 ways that you can go about this project. You can spray the jeans with the bleach or you can soak a pumice stone in bleach and rub it against the jeans. I decided to do both.
Wet the jeans in a sink.
Lay down the drop cloth or take the project outside and wear old clothes in case bleach splashes back. Pour the bleach into the spray bottle. 
Spray the bleach onto the jeans. I changed the nozzle until the bleach came out in a straight shot versus shower like and sprayed in different patterns. 
I sprayed both sides twice without waiting for the other side to dry. Let the bleach sit for a minimum of 10 mins. I let mine sit for about 30 mins. Your time will depend on the look you want.
I did use a pumice sponge but I'm not sure if it actually helped with anything since it was a sponge and not a stone. But I let it soak in the bleach for about 5 minutes and rubbed it up and down the legs of the jeans. You can create your own pattern.
Soak the jeans in cold water and throw in the washer and  dryer. I don't have a washer or dryer at home so I handwashed with laundry soap and let the jeans air dry. I took it to the laundromat 2 days later.


Make sure you check out Mckenzie's two tone denim tutorial! What do you guys think about Refashion Mondays?

Blazer vest - DIY & thrifted | Jeans - DIY & thrifted | Oxfords - Seychelles


DIY: Striped Pencil Skirt

    | 20 comments

Happy Labor Day! I hope you're having fun and enjoying the day. I'll be spending mine catching the 50% off sales thrift shopping and attending BBQs and outside festivals. 


A couple weekends back I made another pencil skirt. This time I used striped jersey knit and lined it with black jersey knit. This was to stop it from being see through which most lightweight knits seem to be. I only took one picture before I got started but you can read the tutorial here.


Outfit Details:
Hooded Tank - Sway | Studded Boots - ShoeDazzle

Mo to the Max

    | 31 comments


It's time for another Style Me Friday and this week's inspiration is the maxi skirt. This is another piece that I didn't have in my wardrobe so I of course had to make me one. :-) I had some purple knit fabric that didn't have any seams and was tube like so I only had to add elastic to the waist. Since knit doesn't fray, I didn't hem the bottom of the skirt. Super Easy!!

Since I was using 1 inch elastic, I ironed flat a 1 1/2 inch hem around the top of the skirt. 
Topstitch around the edge of the hem leaving an 1/2 inch opening.
Pin a safety pin to one side of the elastic and thread through the opening. 
Continue to push the pin and elastic until you reach the other side of the opening.
Place both ends of the elastic together and topstitch. Cut off the excess.
Straighten out the elastic and adjust until it is flat. Stitch the opening closed.


Simple and easy. Have a great 3 day weekend!!!
Outfit Details:
Tank - Target | Flats - American Eagle | Watch - Target | Earrings - Gifted

DIY: Original Hem

    | 14 comments

Happy Monday ladies! This weekend I was asked to hem some jeans for a friend. I had to shorten the jeans by 6 inches or so on 6 different pairs. When you're in a certain height range, it's usually hard to find jeans in the right length. Yes there are brands they carry lengths in short, regular and long but that brand may not always fit every where else the way you like. So you end up always cuffing or rolling your jeans. 

Jeans can be taken to a tailor but many times it is altered by cutting off the desired amount and sewing a seam around the edge. This takes away from the original look of the jeans and it shows that it was altered. I'm going to show you how to shorten jeans while keeping the original hem and it will look exactly how you bought it. 

Supplies needed:
jeans
scissors
Pins
measuring tape
sewing gauge
sewing machine

Measure your inseam ( from the beginning of your inner thigh down to the end of your ankle).
Measure the inseam of the jeans needing alteration.
Subtract the difference. This is the amount that needs to be removed.
With the jeans right side out, cuff the leg half the measurement we just took. Ex: If 4 inches were to be removed you would cuff the jeans 2 inches.
Use the sewing gauge to make sure the cuff is an even measurement all around. Apply pins to hold in place.
Sew around the hem of the jeans as close as possible to the threaded edge. Sew around again to reinforce.
Cut off the excess fabric and iron flat.
Here are some before and after views of one of the pairs.


It's like having a new pair of jeans. Have you had your jeans shortened with the original hem in place? 


Linking up with: Visible Monday |

DIY: Bright Pencil Skirt

    | 24 comments
 
It's DIY Mondays and this week I've made a pencil skirt. This is my second skirt that I've made like this. The first one was black and I thought it would be nice to have one in a bright color for the summer. After browsing the selections at the fabric store, I chose a shade of pink. Isn't it a pretty color? Here is the tutorial.

Supplies needed:
1 yard of stretchy fabric like Jersey
1 package of 1 inch wide elastic
measuring tape
scissors
pins
chalk or marking pencil
sewing machine
Take your waist measurement around the smallest part of your waist. Divide in half.
Measure from your waist down to the bottom of your knee or the length you choose. Add about 2 inches for seam allowance.
Fold the fabric in half. 
Using a ruler mark the waist measurement horizontally from the fold. Mark the length measurement vertically from the waist measurement. 
Cut across the markings. Sew a seam down the length of the skirt about 1/2 away from the edge.
Put the elastic around your waist and pull snugly. Cut and sew the ends together using a zig zag stitch.
Sew the ends of the elastic together. 
Pin the elastic to the edge of the skirt. Make sure the seam of the elastic is lined up with the seam of the skirt. 
Sew a zig zag stitch or use a serger to stitch the elastic to the skirt. You will need t o pull the elastic to make sure it is lined up on the waist.
Fold down the elastic and tack on the seam to make sure it stays in place. You can also sew around the bottom of the elastic.
Hem your skirt about 1 inch using a long zig zag stitch. This is supposed to help jersey and knit fabrics from gathering.
You can also watch the video tutorial from Mimi G.


I used the skirt as my day to night piece on Saturday. I changed the top, shoes, and accessories and my look went from comfy and casual to date night. How was your weekend?

Outfit Details:
Skirt - DIY
Denim Button Up - H&M
Printed Button Up - Buffalo Exchange
Tank - H&M
Sneakers - Keds
Pumps - Payless
Hat - Kohls